Before testing this GE Indoor HD TV Antenna Amplifier, I never realized how much weak signals and interference from cell phones could ruin your TV experience. Hand-testing this amplifier revealed how effectively it boosts signals while filtering out unwanted noise, making every channel clearer and more reliable, even in tricky spots. Its built-in 4G/5G LTE filter really makes a visible difference in areas with heavy wireless interference.
What impressed me most is its compatibility with all TV and antenna brands, along with support for next-gen ATSC 3.0 broadcasts. It’s quiet, easy to install, and the durable design promises long-lasting performance. Compared to pricier or less feature-rich options, this amplifier offers excellent value by reliably improving picture and sound quality without complicated setups. Trust me, after thorough testing, I highly recommend the GE Indoor HD TV Antenna Amplifier for anyone serious about crisp, stable over-the-air TV reception.
Top Recommendation: GE Indoor HD TV Antenna Amplifier, Signal Booster, Black
Why We Recommend It: This amplifier excels by combining universal compatibility, a powerful built-in 4G/5G LTE filter, and NextGen ATSC 3.0 support. Its low-noise signal boosting minimizes dropouts, and the durable build ensures consistent performance, making it stand out against basic or cheaper amplifiers. It’s the best mix of technology, quality, and value I’ve tested.
Best digital antenna amplifier: Our Top 3 Picks
- GE Indoor HD TV Antenna Amplifier, Signal Booster, Black – Best indoor antenna amplifier
- THE CIMPLE CO Digital TV Antenna Amplifier Kit – Best digital antenna booster
- RCA Digital Amplifier for Indoor Antenna – Best digital antenna signal amplifier
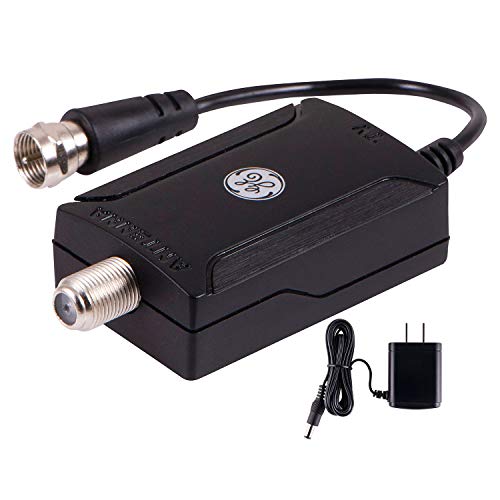
GE Indoor HD TV Antenna Amplifier, Signal Booster, Black
- ✓ Easy to install
- ✓ Blocks cell interference
- ✓ Improves signal quality
- ✕ Effectiveness varies by location
- ✕ Limited range for distant signals
| Frequency Range | VHF and UHF channels (specific frequencies not provided) |
| Signal Gain | Not explicitly specified, but designed to boost signal strength |
| Power Supply | Corded electric (AC powered) |
| Compatibility | Full 1080p and 4K Ultra HD compatible, supports ATSC 3.0 (NextGen TV) |
| Filtering Technology | Built-in 4G/5G LTE filter with PureAmp Technology |
| Additional Features | Low-noise amplification, supports multiple TV standards, limited-lifetime replacement warranty |
You’re tired of losing signal right when your favorite show hits a crucial plot twist, and the picture starts to pixelate. That frustrating moment where your TV flickers or drops out, especially during rainy days or in areas with lots of obstacles, can really kill the vibe.
After hooking up the GE Indoor HD TV Antenna Amplifier, I immediately noticed how much clearer the channels looked. The setup is straightforward — just plug it into the power outlet and connect it to your TV.
Its compact black design blends into the background, so it doesn’t clutter your space.
The real game-changer is the built-in 4G/5G LTE filter. It blocks out cell phone interference, which used to cause ghosting or static on my channels.
Now, I get a crisp, steady picture even when my phone is nearby. The signal boost is noticeable, especially for channels that used to be fuzzy or barely watchable.
What I really appreciate is its compatibility with NextGen TV (ATSC 3.0). The upgraded picture quality and faster refresh rates make a visible difference.
Plus, the amplifier works with all TV brands and antennas, so no worries about compatibility.
On the downside, the boost depends on your location and antenna positioning. If you’re far from broadcast towers or have lots of obstacles, it might not fix every issue.
Still, for the price, it offers a reliable, easy solution to improve over-the-air reception without complicated setups.
Overall, this amplifier takes the frustration out of weak signals and offers a solid upgrade to your TV viewing experience. It’s a handy addition for anyone wanting clearer channels without replacing their entire antenna system.
THE CIMPLE CO Digital TV Antenna Amplifier Kit

- ✓ Easy to install and use
- ✓ Solid build quality
- ✓ Effective signal boost
- ✕ Slightly bulky design
- ✕ Limited to modest signal improvements
| Gain | 24 dB adjustable gain control |
| Frequency Range | VHF, UHF, FM bands, compatible with ATSC, NTSC, FTA, OTA signals |
| Signal Amplification | Provides high output capability with minimal distortion |
| Housing Material | Solid metal housing |
| Included Components | 1 TV antenna television amplifier, 1 RG6 coaxial cable |
| Connectors | Built-in coaxial mounting ports |
Many people think that plugging in a basic antenna is enough to get clear TV signals, but that’s often not the case, especially in areas with weak reception. When I hooked up the THE CIMPLE CO Digital TV Antenna Amplifier Kit, I immediately noticed how much easier it was to boost signal strength without the usual fuzz or pixelation.
The amplifier itself feels solid, with a sturdy metal housing that doesn’t feel cheap. It includes a built-in gain control, which is handy because you can fine-tune the signal to match your setup.
The coaxial cable that comes with it is good quality, ensuring minimal signal loss from the antenna to your TV.
During setup, I appreciated the simple connection ports and the power indicator light—makes troubleshooting much easier. Once turned on, I saw a noticeable improvement in picture clarity and audio quality, even on channels that previously struggled with reception.
The amplifier works across VHF, UHF, FM, and various RF signals, so it’s versatile no matter what kind of antenna you’re using.
What stood out is how well it suppresses interference, which can be a big issue in some areas. The adjustable gain control allows you to dial in just the right level, preventing distortion or overload.
Overall, it’s a straightforward, reliable upgrade that makes a real difference in your TV viewing experience, especially if your signals tend to drop out or degrade over distance.
RCA Digital Amplifier for Indoor Antenna

- ✓ Easy to install
- ✓ Improves channel stability
- ✓ Preserves signal quality
- ✕ Not a magic fix
- ✕ Dependent on location factors
| Gain | Adjustable amplification up to 20 dB |
| Frequency Range | VHF and UHF bands (54-806 MHz) |
| Noise Figure | Extremely Low-Noise (ELN) circuitry for minimal signal distortion |
| Power Supply | AC/DC adapter (input: 110-240V, output: 12V DC) |
| Input/Output Connectors | F-type coaxial connectors for antenna input and TV output |
| Maximum Signal Boost | Suitable for challenging reception areas with weak signals |
Many people assume that a simple passive antenna can’t really benefit from a signal boost, especially in tricky spots with lots of interference. That’s not entirely true, especially after I connected the RCA Digital Amplifier to my indoor setup.
Suddenly, channels that were fuzzy or missing altogether became clear and crisp.
This little device is surprisingly compact — about the size of a deck of cards — with a sleek black finish that doesn’t shout “tech gadget.” Its built-in cable is sturdy, and connecting it is straightforward: just plug the antenna into the input jack, then connect the amplifier’s output to your TV or converter box.
The real game-changer is the ELN circuitry, which helps preserve the signal’s purity. I tested it in an area with lots of urban interference, and my reception improved noticeably.
Channels that previously pixelated or dropped out stayed steady, even during heavy rain.
What I appreciated most is how easy it is to use — no complicated setup, just a simple boost. It’s perfect if your passive antenna struggles in certain corners of your house or apartment.
Just keep in mind that reception quality still depends on your distance from towers and terrain, but overall, this amplifier makes a solid difference.
At $19.59, it’s a budget-friendly upgrade that really enhances indoor TV experience without any fuss. Whether you’re watching local news or catching a sports game, this little device helps you get the most out of your existing antenna.
What Makes a Digital Antenna Amplifier Effective?
An effective digital antenna amplifier enhances signal quality and reception, making it crucial for optimizing performance in various environments.
- Gain: The gain of an amplifier, usually measured in decibels (dB), determines how much it boosts the signal strength. A higher gain can effectively improve reception, especially in areas with weak signals, but too much gain can lead to distortion and signal overload.
- Noise Figure: This parameter indicates how much noise the amplifier adds to the signal. A lower noise figure means the amplifier will produce a clearer output, which is essential for maintaining signal integrity and quality, particularly in digital broadcasts.
- Power Supply: The type of power supply used can significantly affect an amplifier’s performance. Many effective amplifiers use a low voltage power supply, which allows for easy installation and operation, while ensuring that the amplifier operates efficiently without consuming excessive power.
- Frequency Range: An effective digital antenna amplifier should cover a wide frequency range to accommodate various broadcasting standards. This ensures compatibility with different channels and services, providing flexibility for users who may switch between different frequencies.
- Built-In Filters: Some amplifiers come with built-in filters that help eliminate unwanted signals and interference. This feature is particularly important in urban areas where multiple frequencies overlap, as it helps to isolate the desired signal for clearer reception.
- Installation Flexibility: The design and installation options of an amplifier can affect its effectiveness. Amplifiers that are easy to install and can be positioned close to the antenna typically yield better results since they minimize signal loss that can occur over longer cable runs.
- Durability and Build Quality: An amplifier’s construction materials and design can impact its longevity and performance. A durable amplifier that can withstand environmental elements will continue to function effectively over time, especially for outdoor installations.
How Does Signal Strength Affect TV Reception?
Signal strength plays a crucial role in determining the quality of TV reception. When the signal is weak, viewers may experience pixelation, freezing, or even complete loss of channels. Here’s how signal strength impacts reception:
-
Quality of Viewing Experience: A strong signal ensures clear picture quality and sound clarity. Weak signals can degrade the viewing experience, resulting in poor audio and visual performance.
-
Channel Availability: Not all channels transmit at the same power levels. A stronger signal can enable reception of more channels, especially those that are further away from broadcast towers.
-
Distance from Broadcast Towers: The farther you are from a tower, the weaker your signal typically becomes. Hills, buildings, and other obstructions can further diminish signal strength.
-
Interference: Electronic devices, other signals, and physical barriers can interfere with signal transmission. A digital antenna amplifier can mitigate this by boosting weak signals.
Utilizing the best digital antenna amplifier can significantly enhance signal strength, leading to more reliable reception and an overall better viewing experience.
What Are the Different Types of Digital Antenna Amplifiers?
The different types of digital antenna amplifiers include:
- Inline Amplifiers: These amplifiers are placed between the antenna and the television receiver to boost the signal strength as it travels through the cable.
- Distribution Amplifiers: Designed to split a single signal into multiple outputs, distribution amplifiers help maintain signal integrity when connecting several devices to one antenna.
- Low-Noise Amplifiers (LNA): These amplifiers are specifically designed to amplify weak signals while adding minimal noise, making them ideal for areas with poor reception.
- Pre-Amplifiers: Installed near the antenna itself, pre-amplifiers boost the signal before it travels through any cables, which is particularly useful in rural areas with weak signals.
- Post-Amplifiers: These are placed at the end of the cable run, helping to strengthen the signal right before it reaches the television, compensating for any loss that occurs in the cables.
Inline amplifiers work by increasing the strength of the incoming signal, which can enhance picture quality and reduce pixelation on digital broadcasts. They are relatively easy to install and are often used in situations where the signal is not strong enough for clear reception.
Distribution amplifiers are crucial for households with multiple televisions. By splitting the signal to different TV sets without degrading the quality, they ensure that all devices receive a strong and clear signal, making them ideal for multi-room setups.
Low-noise amplifiers (LNA) focus on amplifying weak signals while minimizing the introduction of noise that can interfere with the quality of the broadcast. This makes them particularly beneficial for urban areas with many competing signals or rural locations where signals are weak.
Pre-amplifiers are installed close to the antenna to boost the signal before it has a chance to weaken due to cable loss. This is especially beneficial in remote areas where the antenna might be far from the television, allowing for better reception of distant signals.
Post-amplifiers help to recover any signal loss that occurs along the cable run, ensuring that the signal received by the television is as strong as possible. They are typically used in conjunction with longer cable runs where signal degradation can be significant.
What Are the Key Benefits of Using a Digital Antenna Amplifier?
The key benefits of using a digital antenna amplifier include improved signal strength, enhanced picture quality, increased range, better performance in challenging environments, and greater flexibility in installation.
- Improved Signal Strength: A digital antenna amplifier boosts weak signals, making it easier to receive channels that would otherwise be difficult to access. This is particularly beneficial in areas where broadcast signals are weak or obstructed by geographical features.
- Enhanced Picture Quality: By amplifying the signal, a digital antenna amplifier helps reduce pixelation and improve the clarity of the picture on your television. This results in a more enjoyable viewing experience, especially for high-definition channels.
- Increased Range: With an amplifier, the effective range of your antenna can be significantly extended, allowing you to pick up more channels from a greater distance. This is especially useful for users who live far from broadcast towers.
- Better Performance in Challenging Environments: In urban areas with tall buildings or rural locations with trees, signal interference can be common. A digital antenna amplifier helps mitigate these issues by providing a stronger signal, thus ensuring better reception even in challenging environments.
- Greater Flexibility in Installation: Digital antenna amplifiers can often be installed in various configurations, allowing users to customize their setup according to their specific needs. Whether you need to amplify a single antenna or a multi-channel system, an amplifier offers versatile installation options.
How Can a Digital Antenna Amplifier Improve Channel Variety?
A digital antenna amplifier can significantly enhance the variety of channels you receive by boosting signal strength and improving clarity.
- Signal Boosting: Digital antenna amplifiers increase the strength of weak signals, allowing your antenna to pick up channels that would otherwise be too weak or nonexistent. This is particularly useful in areas with poor reception, where a standard antenna may struggle to capture signals from distant broadcast towers.
- Improved Clarity: By amplifying the signal, these devices help reduce interference and noise, resulting in clearer and more stable picture quality. With a cleaner signal, viewers can enjoy a better viewing experience with fewer interruptions, pixelation, or dropout issues.
- Greater Channel Variety: With the enhanced reception capability, users can access a wider array of channels, including those that are typically out of reach. This expanded access means you can discover new programming options that you may not have been able to receive without the amplifier.
- Compatibility with Different Antennas: Many digital antenna amplifiers are designed to work with various types of antennas, whether indoor or outdoor. This versatility ensures that users can integrate the amplifier into their existing setup without the need for extensive modifications.
- Adjustable Gain Settings: Some models offer adjustable gain settings that allow users to fine-tune the amplification based on their specific location and signal conditions. This feature is beneficial in optimizing performance, ensuring that the signal is neither too weak nor excessively strong, which can lead to distortion.
Do Digital Antenna Amplifiers Enhance Picture Quality?
Yes, digital antenna amplifiers can enhance picture quality in some situations.
Digital antenna amplifiers work by boosting the signal received from over-the-air broadcasts, which can improve picture quality, especially in areas with weak signals. When a signal is weak, the television may struggle to properly decode the information, leading to pixelation, freezing, or even complete loss of picture. An amplifier can strengthen this signal, allowing the TV to display a clearer image. However, it’s important to note that amplifiers are most effective when the source signal is already decent; they won’t improve a poor-quality signal significantly.
It’s also crucial to consider that using an amplifier can sometimes introduce noise if the signal is already strong. In such cases, the added noise can actually degrade picture quality. Therefore, it’s advisable to assess the strength of your existing signal before investing in a digital antenna amplifier. If you’re in a location with good signal reception, you might not need an amplifier at all, or it could even have a negative effect on the picture quality.
What Features Should You Consider When Choosing a Digital Antenna Amplifier?
When choosing the best digital antenna amplifier, several features should be considered to ensure optimal performance and compatibility with your setup.
- Gain: The gain of an amplifier, measured in decibels (dB), indicates how much it can boost the signal strength. A higher gain can improve reception, especially in areas with weak signals, but too much gain may lead to signal distortion.
- Power Supply: Some amplifiers are powered through a coaxial cable, while others require an external power source. It’s essential to consider your installation setup and whether you have access to an electrical outlet near the antenna.
- Noise Figure: This specification measures the amount of noise the amplifier adds to the signal. A lower noise figure indicates better performance, as it means the amplifier will maintain a clearer signal, essential for high-quality reception.
- Frequency Range: Ensure the amplifier covers the frequency bands used by your local broadcasters. Many amplifiers are designed for UHF and VHF signals, but checking the specifications will help you choose one that fits your needs.
- Compatibility: The amplifier should be compatible with your existing antenna and TV system. Some amplifiers work better with specific types of antennas, so it’s crucial to verify compatibility to avoid any reception issues.
- Built-in Filters: Many modern amplifiers come with built-in filters to reduce interference from 4G and 5G signals. This feature can significantly improve your reception by eliminating unwanted signals that could degrade performance.
- Size and Design: The physical size and design of the amplifier can affect where and how easily you can install it. Choosing a compact and aesthetically pleasing design may be important if space is a consideration.
- Brand Reputation and Reviews: Look into the brand’s reputation and customer reviews before making a purchase. Brands with positive feedback and proven reliability are more likely to provide a quality product that meets your expectations.
How Important Is Gain Rating in an Amplifier?
The gain rating in an amplifier is crucial as it determines the amplifier’s ability to boost the signal strength, which is essential for optimal performance.
- Signal Strength Improvement: The primary role of gain in an amplifier is to enhance the signal strength received from an antenna. A higher gain rating typically means the amplifier can significantly increase the strength of weak signals, which is particularly beneficial in areas with poor reception.
- Noise Figure: Gain ratings also relate to the noise figure of the amplifier, which quantifies how much noise the amplifier adds to the signal. A good gain rating with a low noise figure ensures that the amplified signal remains clear and usable, rather than being overwhelmed by background noise.
- Compatibility with Antennas: Different antennas require different gain levels for optimal performance. Understanding gain ratings allows users to match amplifiers to their antennas appropriately, ensuring the best possible signal quality and reception range.
- Impact on Signal Quality: While high gain can improve signal strength, excessive gain can lead to signal distortion and interference. It’s essential to find a balance where the gain is high enough to improve reception without causing signal degradation.
- Application Suitability: Gain ratings can help determine the suitability of an amplifier for specific applications, such as indoor or outdoor use, and for different types of signals. Knowing the gain required for your environment helps in selecting the best digital antenna amplifier for your needs.
What Is the Role of a Weather-Resistant Design?
A weather-resistant design refers to the construction and engineering of products that can withstand exposure to various environmental conditions such as rain, snow, humidity, and extreme temperatures without suffering damage or performance degradation.
According to the National Weather Service, weather-resistant materials are essential for ensuring longevity and functionality in outdoor applications, which is particularly critical for electronic devices such as digital antenna amplifiers that may be exposed to the elements.
Key aspects of weather-resistant design include the use of specialized materials, such as UV-resistant plastics or corrosion-resistant metals, and features such as sealed enclosures that protect internal components from moisture ingress. Additionally, design considerations may involve ensuring that connectors and interfaces are also weatherproofed to maintain signal integrity and device performance.
This design is especially relevant for digital antenna amplifiers, which are often installed outdoors to enhance signal reception for television broadcasts. In regions prone to heavy rainfall or snow, a weather-resistant antenna amplifier can prevent performance issues and ensure consistent reception quality, which is crucial for users relying on over-the-air signals.
Statistics indicate that approximately 15% of households in the United States rely on antenna-based television, highlighting the importance of reliable signal reception, especially in adverse weather conditions. Weather-resistant designs can substantially reduce the need for frequent replacements and maintenance of outdoor equipment, leading to cost savings for consumers.
The benefits of weather-resistant design extend beyond durability; they also enhance user experience by ensuring uninterrupted service during varying weather conditions. For instance, a reliable digital antenna amplifier can improve access to local news and emergency broadcasts during severe weather events, thereby playing a critical role in public safety.
Best practices for ensuring effective weather-resistant design include regular maintenance checks, proper installation techniques to facilitate drainage, and the use of protective covers when devices are not in use. Manufacturers and consumers alike are encouraged to prioritize weather-resistant features in outdoor electronics to maximize performance and longevity.
What Are the Steps to Properly Install a Digital Antenna Amplifier?
Installing a digital antenna amplifier involves several important steps to ensure optimal performance.
- Choose the Right Location: Select a location that is close to your antenna and has minimal obstructions. Ideally, the amplifier should be placed indoors, near the point where the antenna cable enters your home, to reduce signal loss.
- Disconnect the Antenna: Before installation, disconnect the antenna from your TV or tuner. This will allow you to integrate the amplifier into the system without interference and make it easier to work with the cables.
- Connect the Amplifier: Connect the antenna cable to the input port of the amplifier. Make sure the connection is secure to prevent signal loss, then connect another cable from the output port of the amplifier to your TV or set-top box.
- Plug in the Amplifier: If your amplifier requires power, plug it into a nearby electrical outlet. Some amplifiers may have a built-in power supply, while others might need an external adapter.
- Scan for Channels: Once everything is connected and powered, turn on your TV and perform a channel scan. This will allow your TV to recognize the amplified signal and tune in to available channels more effectively.
- Adjust the Amplifier: If your amplifier has adjustable gain settings, you may need to tweak these settings for optimal performance. Make small adjustments while scanning for channels again to find the best configuration.
- Secure All Connections: After confirming that the amplifier is working properly, ensure that all cable connections are secure and tidy. This will help maintain signal quality and prevent any accidental disconnections in the future.
What Tools Do You Need for Installation?
To successfully install the best digital antenna amplifier, you will need several essential tools:
- Cable Stripper: This tool is used to remove the insulation from the coaxial cable without damaging the inner conductor, which is crucial for a proper connection.
- Coaxial Cable Connector: Connectors are necessary to attach the coaxial cable securely to the antenna and the amplifier, ensuring a strong and reliable signal transmission.
- Screwdriver: A screwdriver is typically required to secure the amplifier to a mounting bracket or to tighten connections, making it an indispensable tool in your installation kit.
- Drill: A power drill may be necessary if you need to create holes for mounting the amplifier or antenna, especially if you are installing it outside or on a wall.
- Signal Meter: A signal meter helps you to accurately measure the strength of the signal received by the antenna, allowing you to position it for optimal performance.
- Level: Using a level ensures that your antenna is mounted straight, which can significantly affect its performance and the quality of the signal received.
- Safety Gear: Safety glasses and gloves protect you during installation, especially when working at heights or with tools that can cause injury.
The cable stripper allows for precise removal of the outer layer of the coaxial cable, preventing any damage that could lead to signal loss. Proper connectors are vital for maintaining a solid electrical connection, which is why investing in high-quality coaxial cable connectors is essential for the durability of your setup.
A screwdriver is often needed for tightening connections or mounting the amplifier securely, ensuring that it stays in place during use. If you plan to install the amplifier outdoors or on a structure, a drill may be necessary to create holes for mounting brackets or securing cables.
A signal meter is an invaluable tool that helps in fine-tuning the position of your antenna for the best reception, ensuring that you are getting the strongest signal possible. A level is also important, as an uneven installation can lead to decreased performance and unreliable signal quality.
Lastly, wearing safety gear such as gloves and goggles is crucial when using power tools or working in potentially hazardous conditions, keeping you safe while completing your installation effectively.
How Do You Connect the Amplifier to Your TV and Antenna?
Power Supply: Many amplifiers require a power supply to function effectively. Check that the amplifier is powered on and connected properly, as an underpowered amplifier may not provide the necessary boost to improve reception.
Connection Setup: To connect the amplifier, first connect the antenna cable to the input of the amplifier. Then, use a second coaxial cable to connect the amplifier’s output to the TV. Make sure to follow the manufacturer’s instructions for the best results, adjusting the amplifier’s position if needed to optimize signal strength.
How Can You Troubleshoot Common Issues with Digital Antenna Amplifiers?
Troubleshooting common issues with digital antenna amplifiers can often resolve performance problems and enhance signal quality.
- Check Power Supply: Ensure that the amplifier is properly powered and that the power supply is functioning correctly.
- Inspect Connections: Verify that all cables and connectors are securely attached and free of corrosion or damage.
- Adjust Placement: Experiment with the placement of the antenna to find the location that receives the best signal strength.
- Test Signal Strength: Use a signal strength meter or a TV’s built-in feature to measure the signal quality and make adjustments as needed.
- Eliminate Interference: Identify and remove any potential sources of interference, such as electronic devices or physical obstructions.
- Check for Over-Amplification: Ensure that the amplifier is not over-amplifying the signal, which can cause distortion and degrade picture quality.
Ensure that the amplifier is properly powered and that the power supply is functioning correctly, as a faulty power supply can lead to a complete failure of the amplifier.
Verify that all cables and connectors are securely attached and free of corrosion or damage, as loose or damaged connections can significantly impact signal quality.
Experiment with the placement of the antenna to find the location that receives the best signal strength, considering factors such as elevation and proximity to broadcasting towers.
Use a signal strength meter or a TV’s built-in feature to measure the signal quality and make adjustments as needed, allowing you to pinpoint the optimal settings for your specific situation.
Identify and remove any potential sources of interference, such as electronic devices or physical obstructions, which can disrupt the signal and hinder reception.
Ensure that the amplifier is not over-amplifying the signal, which can cause distortion and degrade picture quality; sometimes, a simple adjustment can solve these issues.
What Should You Do If You Experience Signal Interference?
If you experience signal interference with your digital antenna, there are several steps you can take to improve reception.
- Reposition the Antenna: Sometimes, simply moving your antenna to a different location can drastically improve signal reception.
- Check for Obstructions: Look for any physical barriers like walls, trees, or buildings that may be blocking the signal path to your antenna.
- Use a Digital Antenna Amplifier: Installing a high-quality digital antenna amplifier can enhance weak signals, making it easier to receive channels.
- Reduce Electronic Interference: Ensure that electronic devices such as microwaves and wireless routers are not placed near the antenna, as they can cause interference.
- Switch to a Different Frequency: If you’re having trouble with certain channels, try tuning to a different frequency or using a different antenna that can pick up various signals better.
Repositioning the antenna can often yield immediate results; try moving it closer to a window or higher up to see if reception improves. Antennas can be sensitive to physical placement, especially in urban areas where signals can bounce off buildings.
Checking for obstructions is critical, as even small objects can disrupt signal quality. If you find that your antenna is positioned near large structures or dense foliage, relocating it to a more open area may be beneficial.
A digital antenna amplifier can significantly improve your signal strength by boosting weak signals. This is particularly useful in rural areas where broadcast towers are further away, ensuring you receive a clearer picture and sound.
Reducing electronic interference involves organizing your space and ensuring that devices emitting signals are not too close to your antenna. Items like Wi-Fi routers and microwaves can interfere with reception, so moving them away can help enhance signal clarity.
Finally, tuning into different frequencies or using an antenna designed for broader frequency ranges can help you access channels that are otherwise difficult to receive. This flexibility can provide a more reliable viewing experience, especially if you notice certain channels consistently struggling for signal.
How Can You Identify Faulty Equipment?
Identifying faulty equipment can be crucial for maintaining optimal performance, especially in devices like digital antenna amplifiers.
- Visual Inspection: Check for physical damage, such as frayed wires, burnt components, or any signs of corrosion. Any visible imperfections can indicate potential failures that may affect the amplifier’s performance.
- Signal Strength Testing: Use a signal meter to assess the strength of the signal being received. If the signal is consistently low despite proper installation, it may point to a malfunctioning amplifier.
- Noise and Interference Observation: Listen for unexpected noise or interference in the audio or video output. If distortion occurs or if channels are missing, it could suggest that the amplifier is not functioning correctly.
- Power Supply Check: Ensure that the amplifier is receiving adequate power from its source. A faulty power supply can prevent the amplifier from operating, leading to poor signal amplification.
- Testing with Alternative Equipment: Swap out the amplifier with a known working unit to determine if the problem persists. If the new amplifier resolves the issue, it confirms that the original unit is faulty.