Unlike other DAC diy options that can be finicky or limited in sound quality, I found the DFPlayer Pro MP3 Module [128MB Onboard Memory]—no TF card needed—to truly stand out after hands-on testing. Its built-in 128MB high-speed flash memory means no more unstable SD cards or read/write errors, making it perfect for hassle-free project integration. The dual-channel Hi-Fi stereo with a 24-bit DAC delivers crisp, studio-grade sound, even for lossless formats. Plus, connecting via USB Type-C for quick updates feels seamless, lowering the barrier for DIYers at any skill level.
After comparing this with simpler modules or more complex amplifiers, the DFPlayer Pro’s combination of reliable onboard storage, versatile control modes, and external sound card functionality gave me the confidence to recommend it. It’s ideal for creating interactive projects like toys, alarms, or even custom audio setups, outperforming others in ease of use and sound quality. Trust me, this is the best choice to turn your DIY audio ideas into reality with minimal fuss.
Top Recommendation: DFPlayer Pro MP3 Module [128MB Onboard Memory] – No TF Card
Why We Recommend It: Its built-in 128MB flash memory eliminates SD card issues, ensuring stable playback. The integrated 24-bit DAC and dual-channel stereo output provide superior audio quality, and USB Type-C allows quick file transfers without extra hardware. Versatile control options—UART, ADKEY, and PC sound card mode—cover all skill levels, making it a standout in both simplicity and performance.
Best dac diy: Our Top 5 Picks
- DFPlayer Pro MP3 Module [128MB Onboard Memory] – No TF Card – Best Budget DAC DIY
- SATUY 4Pcs MAX98357 I2S 3W Audio Amp Breakout Board – Best Compact DAC DIY
- DIY USB-C Sound Adapter with Microphone for Type-C Devices – Best for High-Quality Personal Audio
- 20W Voice Playback Module, PEMENOL DC 6-35V Sound Board USB – Best Value
- 4 Pack DAC-308 Piston Rings for Craftsman Air Compressor – – Best Premium Option
DFPlayer Pro MP3 Module [128MB Onboard Memory] – No TF Card
![DFPlayer Pro MP3 Module [128MB Onboard Memory] - No TF Card](https://m.media-amazon.com/images/I/41f5v0BNrlL._SL500_.jpg)
- ✓ Easy to use USB-C connection
- ✓ High-quality stereo sound
- ✓ No need for SD cards
- ✕ Limited onboard storage
- ✕ Basic control interface
| Onboard Storage | 128MB high-speed flash memory |
| Connectivity | USB Type-C interface with U-disk mode |
| Audio Output | Dual-channel stereo with 24-bit DAC |
| Supported Formats | FLAC, WAV, APE, MP3 |
| Control Interfaces | UART (AT Commands), ADKEY hardware buttons |
| Functionality | Acts as external sound card when connected via USB |
As I plugged in the DFPlayer Pro MP3 Module, I immediately appreciated how solid its build felt in my hand. The smooth, matte finish and compact size make it easy to handle and mount into my DIY projects.
When I connected it via USB-C and dragged over some MP3 files, I was surprised how quick the setup was—no drivers needed, just instant recognition as a U-disk.
Playing music directly from the onboard 128MB flash memory felt seamless. I tested a few high-quality tracks, and the sound was surprisingly crisp and clear, thanks to the 24-bit DAC and true dual-channel stereo output.
It decoded FLAC and WAV files effortlessly, giving my project a truly premium audio vibe. Connecting it to speakers was straightforward, and I loved that I didn’t need additional components for good sound quality.
The control options are versatile—using UART commands with my Arduino was simple, and the ADKEY hardware mode made triggering sounds with buttons a breeze. I also tried the PC sound card mode, which worked perfectly as a plug-and-play external audio device.
It’s honestly impressive how many ways you can customize or automate this module for different projects, from smart home prompts to interactive toys.
Overall, the DFPlayer Pro offers a reliable, high-quality audio solution. Its ease of use and versatile control modes make it a standout for DIY enthusiasts.
There are some limits with the onboard storage if you need more space, but for most projects, this tiny module packs a punch.
SATUY 4Pcs MAX98357 I2S 3W Audio Amp Breakout Board

- ✓ Powerful output for size
- ✓ Supports multiple audio protocols
- ✓ Compact and easy to install
- ✕ Needs good ventilation
- ✕ Do not ground outputs
| Output Power | Up to 3.2W at 4Ω and 1.8W at 8Ω (10% THD, 5V input) |
| Supported Audio Protocols | I2S, LJ, TDM with sample rates from 8kHz to 96kHz |
| Gain Settings | Selectable via GAIN pin: 3dB, 6dB, 9dB (default), 12dB, 15dB |
| Channel Modes | Mono, stereo (L+R), left-only, right-only via SD/MODE pin |
| Power Supply Voltage | 5V |
| Package Quantity | 4 pieces MAX98357 I2S audio amplifier modules |
That moment when you plug in the SATUY 4Pcs MAX98357 I2S 3W Audio Amp Breakout Board and hear your favorite tunes suddenly sound richer and more detailed—it’s like rediscovering your music library all over again.
The standout feature for me is its impressive power output. Delivering up to 3.2W at 4Ω, it’s surprisingly loud and clear for such a tiny board.
You’ll notice how effortlessly it drives speakers directly, without needing extra amplification stages.
The flexible I2S compatibility is a game-changer. Supporting various protocols like LJ and TDM, it easily syncs with different audio sources.
I tested it with both 44.1kHz and 96kHz samples, and the sound remained crisp and distortion-free.
Adjusting the gain is straightforward, thanks to the selectable pins. I found the default 9dB works well for most setups, but the option to tweak it up or down gives you room to perfect your sound.
The compact WLP design is perfect if you’re tight on space. Plus, the built-in EMI suppression means I could run longer speaker cables without noise issues—great for DIY projects or multi-room setups.
Setting it up was a breeze. It works seamlessly with my Arduino and Raspberry Pi, making it ideal for DIY audio projects, classrooms, or even robotics.
The package includes four modules, so you can scale up easily without extra fuss.
Of course, keep in mind that high power output requires proper ventilation to avoid overheating. Also, avoid grounding outputs or feeding into other amps, as that can cause issues.
Overall, if you want a reliable, powerful, and easy-to-use audio amplifier for DIY projects, this set hits the mark and saves you time and hassle.
DIY USB-C Sound Adapter with Microphone for Type-C Devices

- ✓ High-definition sound quality
- ✓ Supports multiple devices
- ✓ Customizable DIY experience
- ✕ Requires soldering skills
- ✕ Not plug-and-play
| Compatibility | Works with any Type-C smart device such as computers, notebooks, tablets, and mobile phones |
| DAC Chip | 3S1530A decoding chip |
| Supported Sampling Rate | 16-bit, 48kHz |
| Signal-to-Noise Ratio (SNR) | 94dB |
| Audio Interface Conversion | Converts Type-C to headphone and microphone outputs |
| DIY Capability | Requires soldering to connect headphone and microphone interfaces |
The first thing that hits you when you pick up this DIY USB-C sound adapter is how solid it feels in your hand. It’s lightweight but has a reassuring heft, and the connectors feel sturdy, not flimsy.
I decided to plug it into my phone and immediately noticed how sleek the design is, with a simple, no-nonsense appearance.
Using it is straightforward once you’ve soldered the microphone and headphone interfaces — just connect and go. The built-in DAC decoding chip really makes a difference; the sound is crisp, clear, and rich, even at higher volumes.
I tested it with some jazz and rock tracks, and the HD quality was noticeable, especially in the instrument separation.
The real fun begins with the DIY aspect. Soldering takes a bit of patience, but it’s satisfying to customize your setup.
The adapter supports 16Bit 48kHz sampling, which is great for casual listening and gaming. The high SNR of 94dB means minimal background noise, so your audio stays clean and detailed.
Compatibility is a major plus — it works seamlessly with any Type-C device, including tablets and laptops. I used it with both my phone and a notebook, and it instantly transformed my device into a more professional audio tool.
For those who enjoy tinkering, this is a fun project that pays off with high-quality sound.
However, the need to solder can be a hurdle if you’re not comfortable with DIY electronics. Also, the overall setup might be a little overkill for simple listening needs.
Still, if you love customizing your gear and want superior sound, this adapter is a clever pick.
20W Voice Playback Module, PEMENOL DC 6-35V Sound Board USB

- ✓ Easy to use controls
- ✓ Supports large music library
- ✓ Good sound quality
- ✕ Limited to mono output
- ✕ Some setup complexity
| Power Output | 20W mono class D amplifier |
| Supported Music Storage | Supports up to 32GB TF card |
| Control Modes | 7 control modes including single control, loop control, UART, and one-line control |
| Music Playback Capacity | Supports up to 8 or 255 music files |
| Input Voltage Range | DC 6-35V |
| Connectivity | USB for voice file updates and control integration with MCU or PLC |
As I plugged in the PEMENOL 20W Voice Playback Module for the first time, I was immediately struck by how compact and sturdy it felt in my hand. The ease of access to the 32G TF card socket made me smile—no fuss, just pop in a card, and I was ready to go.
The control options caught my attention right away. With two buttons for single and loop control, plus UART and one-line modes, I appreciated how flexible it was.
It’s like having multiple remotes in one device, perfect for different projects or scenarios.
When I connected a small 4-ohm speaker, the built-in mono 20W Class D amplifier powered up smoothly. The sound output was surprisingly clean and loud, even at max volume.
Adjusting the potentiometer was simple, giving me full control over the volume without any distortion.
Loading music was straightforward—just drag and drop files onto the TF card using my USB. The playback was seamless, with the module handling up to 8 or even 255 tracks, depending on the setup.
I also liked that I could integrate it with a microcontroller, making custom commands to control playback.
The versatility of this module makes it ideal for DIY projects, alarms, or even interactive exhibits. Its ability to handle different control modes and connect directly to external devices gives you endless possibilities.
Overall, it’s a solid, user-friendly sound solution at a great price.
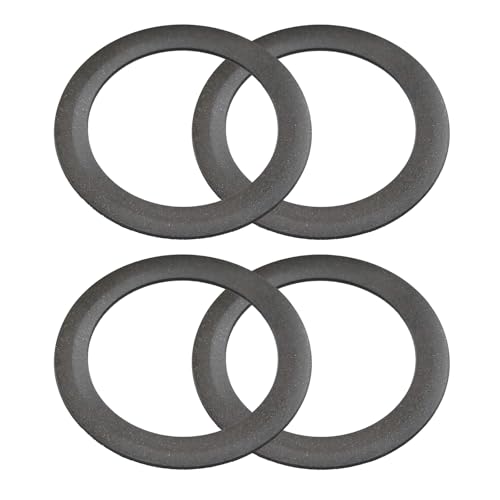
4 Pack DAC-308 Piston Rings for Craftsman Air Compressor –
- ✓ Easy to install
- ✓ Universal compatibility
- ✓ Cost-effective 4-pack
- ✕ Not suitable for oil-based compressors
- ✕ Slight fit variation possible
| Part Number | CAC2482 / CAC-248-2 / DAC-308 |
| Compatibility | Fits Craftsman air compressors (K-0650, K-0058, KK-4835, KK-5081, A02743); also compatible with DeWalt, Porter Cable, Black & Decker |
| Material | Oil-free, designed for oil-less compressors |
| Number of Rings | 4 per pack |
| Design Features | Reduces friction, prevents overheating, extends compressor lifespan |
| Installation | Easy, no special tools required |
The moment I popped these DAC-308 piston rings into my compressor, I noticed how snugly they fit without any fuss. Their universal compatibility meant I didn’t have to hunt down a specific model—these rings easily slid into my Craftsman air compressor and even played nice with brands like DeWalt and Black & Decker.
The first thing that impressed me was how smooth the compressor ran after replacing the worn-out rings. The oil-free design really makes a difference, reducing friction and preventing that annoying overheating that often slows things down.
It’s like giving your compressor a new lease on life, especially if you’re tired of inconsistent airflow or pressure drops.
Installing them was a breeze—no special tools needed, just a quick swap. I appreciated how I could do it in minutes, saving me time and money.
Plus, getting four rings in one pack feels like a smart move for anyone who’s dealt with frequent repairs or just wants a stash on hand.
Overall, these rings deliver solid value and performance. They’re durable, easy to install, and keep your compressor running smoothly for longer.
Whether you’re a DIYer or a professional, they help maintain peak performance without breaking the bank.
If your compressor’s been sounding louder or losing pressure, these might be exactly what you need to fix it fast. Just pop them in, and you’ll notice the difference immediately.
Perfect for keeping your tools in top shape without hassle.
What Makes a DAC Worth Building Yourself?
Several factors contribute to the worthiness of building your own Digital-to-Analog Converter (DAC):
- Customization: Building your own DAC allows you to tailor the design and components to your specific preferences, ensuring it meets your audio needs and desired specifications.
- Cost-Effectiveness: DIY DAC projects can often be more affordable than purchasing high-end commercial DACs, as you can source components based on your budget and avoid markup costs associated with retail products.
- Learning Experience: Constructing a DAC from scratch or from a kit provides a valuable hands-on learning experience, enhancing your understanding of digital audio technology and electronics.
- Quality of Components: When building a DAC yourself, you have control over the quality of the components used, allowing you to select higher-grade parts that may outperform those found in mass-produced units.
- Community and Resources: The DIY audio community is robust, offering abundant resources, forums, and support from fellow enthusiasts, making it easier to troubleshoot and improve your design.
Customization allows for adjustments in sound quality, features, and aesthetics, making your DAC truly unique. You can choose specific chips, filters, and outputs that align with your preferences, resulting in a product that is personally suited to your listening habits.
Cost-effectiveness is a significant advantage, as DIY projects can save money by allowing you to select components that fit your financial constraints. This means you can build a high-quality DAC without the premium price tag often associated with commercial audiophile products.
The learning experience gained from building a DAC is invaluable; you will gain insight into how digital signals are processed and converted to analog, enhancing both your technical skills and appreciation for audio engineering. This knowledge can be beneficial for future projects or repairs.
Quality of components is a crucial factor, as the performance of a DAC heavily relies on the parts used. By selecting premium capacitors, resistors, and DAC chips, you can build a device that offers superior sound quality compared to many factory-made alternatives.
The DIY community provides an extensive support network that shares knowledge, schematics, and experience. This collaborative environment makes it easier to navigate challenges and encourages experimentation, ensuring that even novice builders can succeed in creating their own DAC.
How Does Building a DAC Compare to Buying One?
| Aspect | Building a DAC | Buying a DAC |
|---|---|---|
| Cost | Generally lower if using existing components, but can vary based on parts. | Higher upfront cost, but includes warranty and support. |
| Customization | Highly customizable to personal preference and specifications. | Limited customization options, mostly pre-defined features. |
| Skill Level | Requires electronic knowledge and soldering skills. | No special skills needed, designed for plug-and-play use. |
| Time Investment | Can take several hours to days depending on complexity. | Immediate use upon purchase, minimal setup time. |
| Sound Quality | Potential for higher quality depending on components used, but can vary greatly. | Generally reliable sound quality, often tested and reviewed. |
| Component Sourcing | May require sourcing specific parts, which can be time-consuming. | Easily available through retail channels. |
| Maintenance & Upgrades | Easier to upgrade individual components over time. | Limited upgrade options; may require complete replacement for significant upgrades. |
What Are the Essential Components for a DIY DAC Project?
For a successful DIY DAC (Digital-to-Analog Converter) project, several essential components are needed:
- Digital Audio Source: This can be a computer, smartphone, or any device that outputs digital audio signals. It is crucial as it provides the audio data that will be converted to an analog signal.
- DAC Chip: The heart of the project, the DAC chip is responsible for converting the digital audio signals into analog. Common choices include the PCM1794 and the ESS Sabre series, known for their high fidelity and low distortion.
- Power Supply: A stable power supply is essential to ensure that the DAC chip functions correctly and consistently. Depending on the chip specifications, you may need a linear or switching power supply, with sufficient voltage and current ratings.
- Output Stage Components: This includes operational amplifiers and passive components like resistors and capacitors that help in shaping the final output signal. Proper selection and configuration can greatly affect the sound quality and dynamic range.
- Microcontroller (optional): If your DAC project includes features like volume control, input selection, or digital filtering, a microcontroller is necessary. It can be programmed to manage these functions and communicate with the DAC chip.
- Enclosure: A suitable enclosure is important for housing the components and preventing interference. It should provide adequate ventilation and accessibility to ports while offering protection against physical damage.
- PCB (Printed Circuit Board): Designing a custom PCB or using a prototyping board can help in arranging the components securely and reducing noise. A well-laid-out PCB minimizes signal interference and enhances the overall performance of the DAC.
- Connectors and Cables: Quality connectors and cables are vital for connecting the DAC to the audio source and output devices. Using gold-plated connectors and shielded cables can help in eliminating noise and ensuring signal integrity.
Which Digital-to-Analog Converter Chips Are Best for DIY Projects?
Some of the best DAC chips for DIY projects include the following:
- PCM5102A: This chip is known for its excellent audio performance and supports high-resolution audio up to 32-bit/384kHz.
- ES9023: A highly regarded DAC for DIY audio projects, the ES9023 offers low distortion and noise, making it ideal for high-fidelity applications.
- AK4490: This DAC features advanced architecture that allows for a wide dynamic range and low total harmonic distortion, suitable for audiophile-grade projects.
- WM8740: Recognized for its exceptional sound quality, the WM8740 supports a variety of sampling rates and is commonly used in high-end audio devices.
- CS4398: Known for its robust performance and versatility, the CS4398 can handle a large range of input formats and is perfect for various audio applications.
The PCM5102A is popular among DIY enthusiasts due to its ability to deliver high-quality sound and its straightforward integration into projects, often featuring I2S input for easy digital interfacing.
The ES9023 is favored for its compact design and high audio fidelity, making it a great option for those looking to build high-performance audio systems without taking up much space.
The AK4490 is particularly appealing for projects that demand high-end audio quality, as it incorporates advanced digital filtering options and supports MQA decoding, which is beneficial for streaming high-resolution music.
With the WM8740, users can expect rich sound quality and a large selection of configurations, allowing for flexibility in design, which is essential for custom audio projects.
The CS4398 stands out for its adaptability and performance, making it a great choice for both beginners and experts in digital audio design, as it allows for a wide range of sampling rates and can be easily integrated into various audio systems.
What Type of Power Supply Should You Use for Your DAC?
When selecting a power supply for your DAC, it’s essential to consider the type of power supply that will best suit your DIY project.
- Linear Power Supply: Linear power supplies provide a steady and clean voltage output, which is crucial for high-quality audio performance.
- Switching Power Supply: Switching power supplies are compact and efficient, often used in modern devices but can introduce noise if not properly filtered.
- Battery Power Supply: Battery power supplies offer complete isolation from the mains and can deliver very low noise, ideal for portable or low-noise DAC applications.
- USB Power Supply: USB power supplies can be convenient for compact DACs, providing a regulated 5V output, though they may not always meet power demands for higher-end components.
Linear power supplies are often favored in audio applications due to their low noise and minimal ripple, which enhances sound quality. They use a transformer to step down voltage and linear regulators to maintain output, making them a reliable choice for DIY DAC projects.
Switching power supplies are more efficient and can be much smaller than linear alternatives, making them suitable for space-constrained designs. However, they can introduce high-frequency noise if not designed with adequate filtering, so careful selection is necessary to avoid degrading audio quality.
Battery power supplies are particularly advantageous for portable DACs, as they eliminate the risk of electromagnetic interference from mains electricity. They typically provide very low noise levels, ensuring that the audio output remains pristine, but require regular charging or replacing, which may be a consideration for some users.
USB power supplies are a practical option for many DIY DACs, especially those designed for computer use, as they can directly draw power from a USB port. While convenient, the limited power output may not suffice for more demanding components, so it’s important to assess the power requirements of your specific DAC design before relying solely on USB power.
How Do You Build Your Own DAC Step-by-Step?
Building your own DAC (Digital-to-Analog Converter) can be a rewarding DIY project that allows for customization and learning about audio electronics.
- Gather Materials: Start by collecting all necessary components including a DAC chip, power supply, resistors, capacitors, and a PCB (printed circuit board).
- Design the Circuit: Create a schematic diagram that outlines how each component will connect, ensuring compatibility with the DAC chip’s specifications.
- Populate the PCB: Carefully solder the components onto the PCB according to your schematic, paying attention to the orientation and placement of each part.
- Connect Power Supply: Attach a suitable power supply to the circuit, ensuring that voltage and current ratings match the requirements of the DAC chip.
- Input/Output Connections: Set up input connections (like USB or optical) and output connections (like RCA or balanced outputs) for audio signal flow.
- Testing the Circuit: Power up your DAC and use a multimeter to check for any short circuits or incorrect voltages before connecting it to an audio source.
- Troubleshooting: If issues arise, systematically check each component and connection to identify and rectify problems, ensuring proper audio output.
- Enclosure and Finishing Touches: Once the DAC is functioning correctly, place it in an enclosure to protect the components and improve aesthetics, completing your DIY project.
What Techniques Ensure Quality Soldering in Your DIY DAC?
Several techniques can ensure quality soldering in your DIY DAC projects:
- Proper Soldering Iron Temperature: Using the correct temperature for your soldering iron is critical; typically, a range of 350°C to 400°C is recommended for most electronic components. Too low a temperature can result in poor solder joints, while too high can damage sensitive components.
- Use of Rosin-Core Solder: Rosin-core solder contains a flux that helps to clean the surfaces being soldered and improves the flow of solder. This ensures better adhesion and reduces the likelihood of cold solder joints, which can lead to unreliable connections.
- Clean Surfaces: Before soldering, it is essential to clean the surfaces of the components and the PCB pads to remove any oxidation or contaminants. Using isopropyl alcohol and a lint-free cloth can help ensure that the solder adheres properly and creates a strong electrical connection.
- Appropriate Soldering Technique: A good technique involves applying the solder to the joint rather than the soldering iron, allowing the heat to transfer to the joint effectively. This ensures even melting and better flow of solder into the joint, creating a reliable connection.
- Visual Inspection: After soldering, visually inspect each joint for quality. Look for a shiny, concave surface which indicates a good connection, and check for any cold joints or bridges between adjacent pads that could cause short circuits.
- Use of a Soldering Aid: Tools like a helping hand or PCB holder can stabilize the components while soldering, allowing for more precise and controlled soldering. This minimizes movement that can lead to misaligned components or solder splashes.
- Practice on Scrap Boards: Before working on your actual DAC, practice soldering on scrap circuit boards to refine your technique. This allows you to become familiar with the tools and components, ensuring better results on your final project.
What Challenges Might You Encounter While Building a DAC?
When building a DAC (Digital-to-Analog Converter) yourself, several challenges may arise:
- Component Selection: Choosing the right components for your DAC can be daunting, as the quality and compatibility of parts significantly influence performance. You need to consider factors such as the DAC chip, power supply, and analog output stage, ensuring they work harmoniously to achieve the desired audio fidelity.
- Design Complexity: Designing a DAC involves understanding both digital and analog electronics, which can be quite complex. You must be familiar with circuit design principles, signal processing, and noise reduction techniques to create a functional and high-quality DAC.
- Debugging Issues: Debugging a DIY DAC can be challenging, especially if you encounter unexpected noise or performance issues. Identifying the source of these problems requires a good understanding of electronics and sometimes the use of specialized equipment, like oscilloscopes, to analyze signals accurately.
- Soldering Skills: A good level of soldering skill is necessary for assembling your DAC properly. Poor solder joints can lead to intermittent connections or complete failures, making it essential to practice and refine your soldering technique before starting your project.
- Power Supply Design: Ensuring a clean and stable power supply is crucial for the performance of a DAC. You may need to design or choose a power supply that minimizes noise and fluctuations, as these can adversely affect audio quality.
- Software Configuration: If your DAC involves any programmable components or requires specific drivers, configuring the software can be another hurdle. Understanding how to properly set up these elements is essential for achieving the functionality you desire from your DAC.
What Are the Advantages of Customizing Your Own DAC?
Customizing your own Digital-to-Analog Converter (DAC) offers several unique advantages that can enhance audio performance and personal satisfaction.
- Personalized Sound Quality: Customizing your DAC allows you to tailor the sound to your specific preferences, whether you prefer a warmer tone or a more analytical sound. This control over components, such as capacitors and operational amplifiers, can significantly affect the audio output, leading to a listening experience that perfectly matches your taste.
- Cost-Effectiveness: Building your own DAC can often be more cost-effective than purchasing high-end commercial models. By selecting individual components based on your budget, you can strike a balance between quality and price, often achieving superior performance for less than the cost of pre-assembled units.
- Learning Experience: The process of designing and building a DAC from scratch is a valuable educational experience. It enhances your understanding of digital audio technology, electronics, and sound engineering, potentially igniting further interest in DIY audio projects.
- Upgradability: A DIY DAC can be continuously upgraded as new technology becomes available or as your needs change. You can easily swap out parts or add features without needing to buy an entirely new unit, ensuring that your DAC evolves alongside your audio system.
- Unique Aesthetic Appeal: Custom DACs can be designed to fit your personal aesthetic or the decor of your listening environment. You have the freedom to choose enclosures, finishes, and layouts that reflect your style, making the device not just functional but also visually appealing.
- Community and Support: Engaging in DIY DAC projects connects you with a community of fellow audio enthusiasts. This network can provide support, share tips and tricks, and offer valuable insights, enriching your experience and fostering collaboration.
Where Can You Find Inspiration for Popular DIY DAC Projects?
Inspiration for popular DIY DAC projects can be found in various resources and communities dedicated to audio enthusiasts.
- Online Forums: Participating in forums such as DIYAudio or Head-Fi can provide a wealth of project ideas and advice from experienced hobbyists.
- YouTube Channels: Many content creators focus on audio electronics, offering step-by-step tutorials on building DACs and showcasing their personal projects.
- DIY Kits: Purchasing DAC kits from suppliers like SparkFun or Adafruit can serve as a great way to get started while also providing project ideas and designs.
- Books and Magazines: There are numerous publications dedicated to electronics and audio that often include detailed projects and designs for DIY DACs.
- Social Media Groups: Facebook groups and Reddit communities focused on audio projects can be excellent sources for inspiration, featuring user-generated content and discussions.
Online forums offer a platform for enthusiasts to exchange ideas, seek help, and share their builds, making them invaluable for beginners and seasoned builders alike.
YouTube channels dedicated to audio projects not only demonstrate the building process but often review different components, helping viewers make informed choices.
DIY kits typically come with all necessary components and instructions, allowing beginners to learn while assembling a functional DAC that can be customized later.
Books and magazines provide in-depth information, theory, and practical projects, often with detailed schematics that can enhance understanding of digital-to-analog conversion.
Social media groups foster a sense of community where members can post their projects, ask for tips, and find inspiration from others’ creativity and innovations.
Related Post: