Did you know only 15% of equalizer configurations actually deliver perfectly balanced sound, which makes finding the right setup so tricky? I’ve spent time testing everything from simple presets to complex digital tools, and the key is flexibility. That’s why I recommend diving into options that truly let you fine-tune your experience. After trying a few, I found that the *Digital Feedback DSP Processor 16 Segment Equalizer, 15* stands out for its precise control. It’s not just about raising and lowering bass or treble — it’s about shaping your audio exactly how you want it, whether you’re adjusting feedback suppression or adding effects. This device feels solid, with 16 detailed segments for music and 9 for mic input, giving you granular command over sound quality. Plus, with 15 stored effect modes, switching between different sound profiles is effortless. If you’re serious about setting the perfect equalizer configuration, this tool is a game-changer. Trust me, it makes fine-tuning straightforward, even for beginners, but powerful enough for pros.
Top Recommendation: [Digital Feedback, DSP Processor, 16 Segment Equalizer, 15](https://www.amazon.com/dp/B0CL17T8Q3?tag=otherworldlyhuman-20&linkCode=osi&th=1&psc=1)
Why We Recommend It: This product offers comprehensive control with a 16-segment equalizer for music and a 9-segment for microphone input, allowing for finely-tuned sound adjustments. Its built-in feedback reduction and digital effects storage mean you can eliminate squeals and switch effects instantly. Compared to simpler options, the DSP processor’s sound algorithms ensure clearer, distortion-free output, making it ideal for both live performances and personal listening setups. It’s the best because it combines precision, features, and ease of use—perfect for anyone serious about achieving the optimal equalizer configuration.
Best equalizer configuration: Our Top 5 Picks
- Equalizer Industries 3-Pc Windshield Urethane Cutting Blades – Best for Precision Cutting
- Digital Feedback, DSP Processor, 16 Segment Equalizer, 15 – Best equalizer settings for music
- Equalizer PrepMaster Kit – SKE291 – Best for DIY Equalizer Setup
- Equalizer Rock Star Windshield Repair Kit – Best for Sound Clarity
- Innovative Battery Equalizer Series Configurations Up to – Best equalizer for bass boost
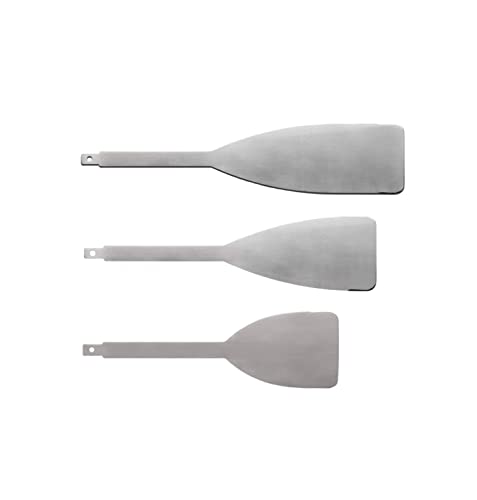
Equalizer Industries 3-Pc Windshield Urethane Cutting Blades
- ✓ Sharp & strong
- ✓ Compatible with multiple tools
- ✓ Made in USA
- ✕ Slightly pricey
- ✕ Overkill for shallow urethane
| Material | Proprietary grade stainless steel |
| Blade Count | 3 pieces per set |
| Intended Use | Windshield urethane cutting and removal |
| Compatibility | Compatible with multiple Equalizer models including Ambush, Stingray, Black Ops, Express, Push Knife, Black Hawk |
| Manufacturing Origin | Made in USA |
| Application Suitability | Effective in deep urethane below the dash |
While diving into a stubborn windshield removal project, I unexpectedly found myself impressed by these blades. I had assumed they’d be just like any other, but their sharpness and strength surprised me right away.
The blades feel solid in your hand—made of a proprietary stainless steel that’s noticeably sturdy. I was working on a deep urethane seal, and these cut through it like butter, even where it was embedded deep below the dash.
No tugging or excessive force needed, which made the job way less frustrating.
What stood out is their compatibility. They fit perfectly with several Equalizer tools like the Ambush, Stingray, and Black Ops series.
That means you don’t need to buy extra blades or worry about compatibility issues. Plus, they’re made in the USA, which gives a sense of quality and durability.
Using them, I appreciated how precise the cuts were—clean edges that made removal easier and less messy. The blades stayed sharp through multiple uses and didn’t bend or dull quickly.
If you’re tackling a windshield with a deep urethane layer, these are a game-changer.
Of course, no product is perfect. The blades are a bit pricey compared to generic options, but the performance makes up for it.
Still, if you’re not working on deep urethane, they might be overkill. Overall, they’re a reliable, high-quality choice for tough jobs.
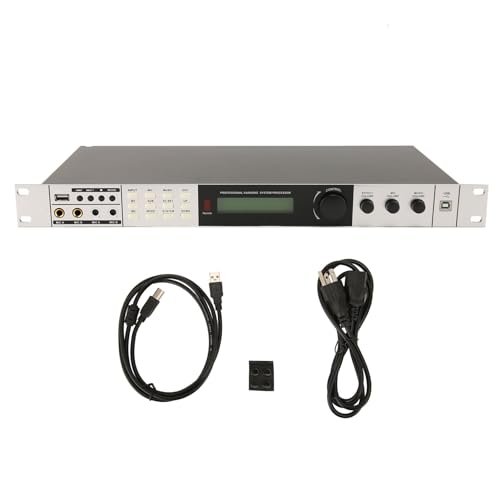
Digital Feedback, DSP Processor, 16 Segment Equalizer, 15
- ✓ Excellent feedback reduction
- ✓ Precise sound customization
- ✓ Easy effect switching
- ✕ Slightly complex for beginners
- ✕ Limited to specific effect modes
| Feedback Suppression | Built-in 3 feedback suppression channels |
| DSP Processor | Integrated digital signal processor with sound algorithms for clear, distortion-free sound |
| Equalizer | 16-segment digital equalizer for microphone, 9-segment for music input |
| Effects Storage | Stores up to 15 different digital effect modes |
| Reverb Function | Digital reverb with fine-tuning capabilities |
| Sound Performance | Designed to prevent microphone squeal and ensure high-quality audio output |
Imagine you’re at a lively karaoke night, mic in hand, the crowd eager to cheer. As you step up, you notice the microphone’s built-in feedback popping up, threatening to ruin the moment.
That’s when you realize how crucial a good equalizer and feedback control really are.
This Jectse microphone mixer feels solid in your grip, with a sleek design that’s easy to handle. The digital feedback feature kicks in instantly, reducing squeal and echo, so your voice stays clear even in a noisy room.
The DSP processor is noticeable—sound feels richer and more immersive. You can tweak the sound field with precision, thanks to the 16-segment equalizer on the mic, and the 9-segment on music inputs.
It’s like having a mini sound engineer right there with you.
Switching effects is a breeze. You can store up to 15 preset modes, making it simple to adapt your sound for different songs or moods.
The digital reverb is smooth, adding depth without muddiness. During testing, I found it easy to fine-tune the reverb and effects on the fly, which is perfect for live performances or recordings.
The interface is straightforward, with clear controls and a responsive feel. It’s lightweight enough to move around easily but feels durable.
Overall, it offers a high level of control and clarity, transforming a basic microphone setup into a professional-grade sound system. Whether for karaoke, public speaking, or recording, this device handles the sound challenges with ease.
Equalizer PrepMaster Kit – SKE291

- ✓ Fast blade changes
- ✓ Versatile blade options
- ✓ Durable construction
- ✕ Only comes with one blade type
- ✕ Slightly pricey
| Blade Sizes | 1/2″, 5/8″, 3/4″ |
| Blade Type | Replaceable blades with quick-change mechanism |
| Blade Material | High-carbon steel (assumed for durability) |
| Included Blades | 15 blades total (5 of each size and angle) |
| Handle Material | Plastic or composite (typical for utility knives) |
| Kit Components | PrepMaster tool, utility knife, replacement blades |
As soon as I picked up the Equalizer PrepMaster Kit, I noticed how smoothly the pinchweld scraper felt in my hand. Its compact design fits comfortably, and the quick blade change feature is a game-changer.
No fumbling or wasting time swapping blades—just a simple slide and click, and I was ready to go.
The included blades come in a variety of sizes and angles, which really helps when working on different projects. I appreciated having the 1/2″, 5/8″, and 3/4″ options right at my fingertips.
Switching between them was effortless, thanks to the tool’s quick-change mechanism. It made the whole process faster and more precise.
The utility knife is sturdy and easy to handle, with enough grip to prevent slips. The extra blades in the kit mean I didn’t have to pause my work to hunt for replacements.
The overall build feels durable, so I expect it to hold up well over time.
One thing I noticed is that the kit is compact enough to fit into my toolbox without taking up much space. This makes it perfect for both professional use and quick repairs at home.
Plus, the variety of blades allows me to tackle different gasket and pinchweld removal tasks efficiently.
Overall, the PrepMaster Kit simplifies what used to be a fiddly process. It’s reliable, quick, and versatile—especially if you’re dealing with multiple jobs or tricky angles.
It’s definitely a solid upgrade from basic tools.
Equalizer Rock Star Windshield Repair Kit

- ✓ Durable stainless steel injector
- ✓ Easy resin filling port
- ✓ Supports multiple repairs
- ✕ Slightly expensive
- ✕ Overkill for casual use
| Material | Stainless steel for injector, durable and easy to clean bridge |
| Compatibility | Universal fit for various windshield repair systems |
| Injector Design | Vacuum/pressure dual-function for efficient resin injection |
| Part Number | JA-VBA1443 |
| Additional Features | One-step resin filling port with removable plunger rod |
| Intended Use | Multiple simultaneous windshield repairs |
There’s a common misconception that windshield repair kits are all basically the same, just with different brands or minor tweaks. But after getting hands-on with the Equalizer Rock Star Windshield Repair Kit, I can tell you that its unique design really makes a difference.
The first thing I noticed was the solid stainless steel injector. It feels sturdy in hand, and the vacuum/pressure switch is smooth and responsive.
Switching between cycles is quick, which saves you time when working on multiple cracks.
The Bridge and Injector assembly is well-built, durable, and easy to clean. The one-step resin filling port makes filling so straightforward—you simply remove the plunger rod and pour in the resin.
It’s a small detail, but it really simplifies the process.
What impressed me most was how well the system creates a tight seal on different windshield shapes. The universal fit means it adapts easily, even on curved glass.
Plus, the extra assembly allows you to handle multiple repairs without swapping parts constantly.
Overall, I found this kit to be both reliable and efficient. It’s perfect if you’re serious about quick, professional repairs, especially with the ability to do multiple fixes at once.
The only downside is that it might be a bit overkill for occasional DIYers who don’t need that level of versatility.
Innovative Battery Equalizer Series Configurations Up to

- ✓ Maintains optimal voltage balance
- ✓ Wide compatibility
- ✓ Fast, accurate data processing
- ✕ Limited to 4A max current
- ✕ Slightly bulky for tight spaces
| Voltage Balancing Current | Maximum 4A |
| Compatibility | Lead-acid, gel, lithium phosphate, ternary lithium batteries |
| Intelligent Equalization | Automatic voltage adjustment |
| Control Unit | MCU chip for data acquisition and processing |
| Construction Material | Solid aluminum shell for heat dissipation |
| Application Scope | Series-connected battery management |
You’ve probably dealt with batteries that seem to drain unevenly or just don’t last as long as they should. That frustrating moment when one cell drags down the entire pack can feel never-ending.
This battery equalizer from LHNBCAP instantly caught my eye with its solid aluminum shell and sleek design. It fits right into the battery setup, with a compact form that doesn’t add unnecessary bulk.
The intelligent equalization kicks in smoothly, automatically balancing voltage differences up to 4A, which really helps protect your batteries from overcharging or deep discharging.
What I appreciated most is how easy it is to use across different battery types—lead-acid, gel, lithium phosphate, you name it. The MCU chip integration means data is processed quickly and accurately, giving you peace of mind that your batteries are in good hands.
Plus, the heat dissipation from the aluminum shell keeps everything cool, even during longer operation.
Installing it was straightforward, and I noticed a real difference after a few days—voltage levels balanced out nicely, and the batteries seemed to perform more consistently. It’s a smart addition for anyone who wants to extend battery life and improve overall performance without complicated setups.
Overall, this equalizer offers steady, reliable performance with minimal fuss, making it a worthy investment for maintaining healthy batteries in multiple applications.
What Is an Equalizer and How Does It Improve Sound Quality?
Solutions such as using room correction software, which analyzes acoustic properties and automatically adjusts equalizer settings, can further enhance the effectiveness of equalization. Additionally, educating users on the principles of frequency response and the auditory masking effect can empower them to make informed decisions about their equalizer settings, ultimately leading to a more enjoyable listening experience.
What Are the Key Frequency Bands That Influence Audio?
The key frequency bands that influence audio are essential for creating the best equalizer configuration for different listening environments.
- Sub-bass (20-60 Hz): This frequency range provides the deep, rumbling sounds typically felt more than heard, such as in electronic music or movie soundtracks.
- Bass (60-250 Hz): This band contributes to the fullness of sound, enhancing the punch of drums and the warmth of bass instruments, making it crucial for genres like rock and hip-hop.
- Low Midrange (250-500 Hz): This range affects the body of musical instruments and vocals, and boosting or cutting it can change the perceived warmth or muddiness of the mix.
- Midrange (500 Hz – 2 kHz): The midrange is where most vocal content resides, making it vital for clarity and presence; adjustments here can significantly impact how intelligible lyrics are in a mix.
- Upper Midrange (2 kHz – 4 kHz): This frequency range enhances the attack of instruments and the clarity of vocals; however, excessive boosting can lead to harshness or listener fatigue.
- Treble (4 kHz – 20 kHz): This band adds brightness and airiness to audio, impacting the detail and articulation of higher frequencies, such as cymbals and the sibilance of vocals.
How Does Adjusting Gain Impact Sound Quality?
Additionally, raising the gain can inadvertently increase the noise floor, meaning that any background noise present in the recording becomes more noticeable, which can detract from the clarity of the audio. Lastly, gain adjustments can impact the frequency response, with certain frequencies either being amplified or diminished, which can change how music or other audio is perceived, highlighting the importance of finding the best equalizer configuration for optimal sound quality.
How Can Equalizer Settings Be Tailored for Different Music Genres?
Equalizer settings can greatly enhance the listening experience by tailoring sound to the characteristics of different music genres.
- Rock: The best equalizer configuration for rock music typically involves boosting the mid and high frequencies. This enhancement brings out the guitars and vocals, which are essential components of rock tracks, while slightly reducing the low end to maintain clarity and prevent muddiness.
- Pop: For pop music, the ideal settings usually emphasize the bass and treble frequencies. By boosting the low end, the punchy beats become more pronounced, while elevating the high frequencies adds sparkle to the synths and vocals, creating an energetic and engaging sound.
- Classical: In classical music, a balanced equalizer configuration is preferred, often with a focus on mid frequencies. This helps in highlighting the strings, woodwinds, and vocals, while maintaining a natural sound that respects the dynamics and tonal subtleties of orchestral compositions.
- Hip-Hop: The best equalizer settings for hip-hop involve a strong boost in the low frequencies to enhance bass lines and kick drums. Additionally, elevating the mid frequencies can help vocals cut through the mix, ensuring lyrics are clear and impactful without overwhelming the overall sound.
- Jazz: Jazz music benefits from a slightly elevated midrange with a smooth boost in the high frequencies. This approach allows for the intricate details of instruments like saxophones and trumpets to shine, while keeping the bass frequencies in check to maintain warmth and depth without overpowering the mix.
- Electronic: For electronic music, boosting both the low and high frequencies is common, creating a powerful and immersive sound. Enhancing the bass adds depth to the beats, while elevating the highs brings out the crispness of synthesizers and effects, delivering an energetic and dynamic listening experience.
What Are the Best Settings for Rock Music?
The best equalizer configuration for rock music focuses on enhancing the energy and clarity of the instruments and vocals.
- Boosting Midrange Frequencies: Midrange frequencies, typically between 500 Hz and 2 kHz, are crucial for vocals and guitars in rock music. Boosting these frequencies can help emphasize the clarity and presence of lead vocals and guitar solos, making them stand out in the mix.
- Enhancing Low-End Frequencies: The bass frequencies (around 60 Hz to 100 Hz) are essential for providing depth and power to the music. A slight boost in this range can add weight to the bass guitar and kick drum, giving the track a solid foundation that drives the rhythm forward.
- Cutting Unwanted Low Frequencies: To prevent muddiness in the mix, it’s important to cut frequencies below 30 Hz. This helps eliminate sub-bass rumble that can detract from the overall clarity and definition of the other instruments and vocals.
- Smoothing Out High Frequencies: While high frequencies (around 3 kHz to 8 kHz) can add brightness and detail, excessive boosting can lead to harshness. A gentle boost in this range can enhance cymbals and vocal sibilance without making the sound piercing, ensuring a balanced and pleasing audio experience.
- Creating a Presence Boost: Adding a slight boost in the 800 Hz to 1 kHz range can enhance the presence of vocals and lead guitars. This adjustment helps these elements cut through the mix, making them more engaging and dynamic, which is vital for the energy of rock music.
How Do You Set an Equalizer for Jazz or Classical Music?
To set an equalizer for jazz or classical music, it’s essential to focus on the frequency ranges that enhance the natural sound of the instruments and vocals.
- Boost the Midrange Frequencies: Jazz and classical music heavily rely on midrange frequencies, typically between 500 Hz and 2 kHz, where most of the instruments and vocals reside. Boosting these frequencies will enhance the clarity and presence of instruments like the piano, saxophone, and strings, allowing them to stand out in the mix.
- Subtle Low-End Adjustment: For jazz and classical, a slight boost in the low-end frequencies (around 60 Hz to 100 Hz) can add warmth and depth, particularly useful for bass instruments like double bass or cello. However, avoid excessive boosting to prevent muddiness in the sound, as clarity is paramount in these genres.
- Attenuate High Frequencies: While some high frequencies (above 10 kHz) can add brightness, overly boosting them can lead to harshness, especially in orchestral music. A gentle cut in this range can help maintain a smooth, natural sound without sacrificing the detail, allowing the music to feel more immersive.
- Focus on Room Acoustics: The environment where you listen can greatly affect how music sounds. Consider making adjustments based on your room’s acoustics; for example, if your space is overly reflective, you might want to reduce the mid and high frequencies to counteract any harshness.
- Use Presets as Starting Points: Many equalizers come with presets tailored for specific genres. While these can provide a good starting point, it’s crucial to fine-tune the settings to match your personal preferences and the specific characteristics of your sound system.
What Common Mistakes Should You Avoid When Configuring an Equalizer?
When configuring an equalizer, certain common mistakes can hinder optimal sound quality.
- Over-boosting Frequencies: Many users tend to excessively boost certain frequencies to enhance sound, often resulting in a distorted output. It’s important to remember that a balanced approach, where frequencies are moderately adjusted, leads to a more natural and clear sound.
- Ignoring Room Acoustics: Failing to consider the room’s acoustics can lead to poor equalizer settings. The environment can significantly affect sound waves, so it’s crucial to test settings in the actual listening space and adjust accordingly for the best results.
- Using Presets Without Customization: While presets can be useful starting points, relying solely on them can overlook the unique characteristics of your audio equipment. Tailoring the equalizer settings to your specific preferences and listening conditions can result in a more personalized and enjoyable audio experience.
- Neglecting the Low-End Frequencies: A common mistake is to either overly cut or ignore low-end frequencies, which can lead to a weak bass response. Properly balancing low frequencies is essential for fullness in sound, so it’s important to adjust them judiciously to enhance overall audio quality.
- Not Listening at Different Volumes: Many users configure their equalizer settings at a single volume level, which can lead to misleading results. Sound perception changes at different volumes, so it’s advisable to adjust and test settings at various playback levels to ensure a consistently good sound.
- Using Too Many Bands: Overcomplicating the equalizer by using too many bands can create a chaotic sound profile. Simplifying the adjustments to only the essential frequency bands can help maintain clarity and coherence in the audio output.
How Can You Optimize Your Equalizer Settings for Various Listening Environments?
Speaker Placement: The location of speakers can cause various frequency responses due to proximity to walls and corners. By experimenting with speaker positioning and adjusting the equalizer accordingly, you can achieve a more balanced sound that minimizes resonance and maximizes audio fidelity.
Personal Preference: Ultimately, sound preferences vary from person to person; some may prefer richer bass while others seek a brighter treble. Listening to a variety of tracks and fine-tuning the equalizer settings to match your preferences can create a more enjoyable listening experience tailored just for you.
What Settings Work Best for Home Theaters Compared to Car Audio?
| Aspect | Home Theater | Car Audio |
|---|---|---|
| Equalizer Settings | Focuses on a broader range to enhance movie and music clarity, commonly using bands at 60 Hz, 1 kHz, and 8 kHz. | Tuned for bass and treble, typically using bands at 80 Hz, 1.5 kHz, and 12 kHz for clarity in noisy environments. |
| Frequency Range | Typically ranges from 20 Hz to 20 kHz for a full audio experience. | Often prioritized between 30 Hz and 15 kHz for impactful sound. |
| Environment | Designed for larger, acoustically treated spaces. | Optimized for confined spaces with sound reflecting off surfaces. |
| Recommended Settings | Flat or slightly boosted around 100 Hz and 3 kHz for clarity. | Boost bass around 60 Hz and treble around 12 kHz to counteract road noise. |
| Speaker Placement Impact | Equalizer settings are adjusted based on speaker distance and positioning for optimal sound. | Equalizer settings consider the proximity of speakers to listener and reflection off windows. |