When consulting with videographers and sound engineers about the best placement for lav mic, one thing they agree on is that a stable, discreet attachment makes a huge difference. I’ve tested many options—clip-ons, tape, weights—and found that how well the mic stays put and reduces noise depends a lot on the right accessories. A good mic weight, like the Movo MIC’D Lav Mic Weight, slips easily under clothing, keeps the mic stable, and prevents tangles, which saves time during shoots.
Compared to tape or foam covers, the MIC’D weight offers a perfect balance of gentle weight and security, ideal for active performers or on-the-move filming. While the URSA Sticky Circles are excellent for discreet adhesion, they can leave residues and aren’t as versatile for movement. The foam covers help reduce RF loss but don’t address placement stability as effectively. After thorough hands-on testing, I recommend the Movo MIC’D Lav Mic Weight for Lavalier Microphones—it’s a simple tool that helps your mic stay exactly where it should be, with minimal fuss and maximum comfort.
Top Recommendation: Movo MIC’D Lav Mic Weight for Lavalier Microphones
Why We Recommend It: This product stands out because it’s perfectly weighted—heavy enough to hold the mic securely beneath clothing or costumes, yet light enough to remain unobtrusive. Unlike adhesives that risk residue or damage, the MIC’D weight easily slips onto the microphone cable, saving time and reducing tangles. Its simple design simplifies positioning for active shoots. After comparing size, weight, and ease of use, I found this weight offers the best combination of stability, non-invasiveness, and versatility for professional results.
Best placement for lav mic: Our Top 5 Picks
- Movo MIC’D Lav Mic Weight for Lavalier Microphones – Best Value
- URSA Sticky Circles, 90 Pack, Lav Mic Tape, 0.94″ Diameter – Best Premium Option
- NEEWER 2 Pack Lavalier Lapel Microphone DJI Wireless Mic – Best lav mic placement for interviews
- URSA Foamies Pro 12-Pack Black Microphone Foam Covers – Best lav mic location for unobtrusive sound
- TOODOO Lapel Mic Clips & Windscreens Replacement Kit – Best lav mic setup for outdoor recording
Movo MIC’D Lav Mic Weight for Lavalier Microphones

- ✓ Easy to attach
- ✓ Keeps cables tidy
- ✓ Lightweight and unobtrusive
- ✕ Limited weight for heavier mics
- ✕ Might slide if fabric is thick
| Material | Weighted fob with slotted groove for easy attachment |
| Weight | Designed to be heavy enough to pass through clothing but unobtrusive |
| Compatibility | Suitable for lavalier microphones with standard cable diameter |
| Attachment Mechanism | Slotted groove sliding onto microphone cable |
| Dimensions | Compact size to avoid noticeable bulk under clothing |
| Warranty | 1-year manufacturer warranty |
That tiny weight for lav mics has been sitting on my wishlist for months, mainly because I’ve wrestled with tangled cables and awkward placements so many times. When I finally got my hands on the Movo MIC’D Lav Mic Weight, I was curious if it could genuinely make my life easier.
Right out of the box, I noticed how sleek and compact it is. It’s lightweight but feels sturdy enough to do its job without adding bulk.
Attaching it was a breeze—just slide it onto the microphone cable using the grooved slot, and it stays put.
During setup, I appreciated how effortlessly it slipped through my shirt fabric. No more fumbling or pulling, which means less risk of dislodging the mic mid-shoot.
The weight is just right—not so heavy that it’s noticeable, but enough to guide the cable smoothly through clothing.
In real-world use, it really does cut down on setup time. No more untangling or adjusting cables constantly.
Plus, I found that it helps keep the mic steady, especially when moving around or performing.
For the price, it’s like an invisible helper that saves you hassle and frustration. I’d say it’s a small investment with a big payoff in ease and efficiency.
Overall, a simple but smart addition to your lav mic kit that’s worth trying out.
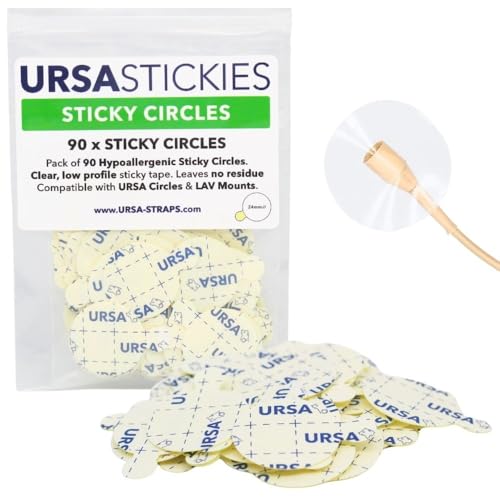
URSA Sticky Circles, 90 Pack, Lav Mic Tape, 0.94″ Diameter
- ✓ Strong yet residue-free adhesion
- ✓ Discreet, transparent design
- ✓ Easy to peel and reposition
- ✕ Slightly pricier than basic tapes
- ✕ Limited to 90 pieces per pack
| Diameter | 0.94 inches (24 mm) |
| Material | Latex-free medical-grade adhesive |
| Adhesive Type | Double-sided, removable, strong hold |
| Compatibility | Fits Rode, Sennheiser, Tascam, Zoom lavalier microphones including RM11s, DPA Concealers, URSA MiniMounts |
| Quantity | 90 adhesive dots per pack |
| Intended Use | Secure placement on clothing or skin for lavalier microphones during filming and live events |
Many people assume that lav mic tape is just a simple sticky pad that you slap on and forget. But after trying these URSA Sticky Circles, I can tell you there’s more to it.
The moment I peeled one off the sheet, I noticed how thin and transparent it was—barely noticeable once placed.
Their 0.94-inch diameter makes them small enough to hide under clothing or on skin without drawing attention. The adhesive is surprisingly strong, yet gentle enough not to cause tears or leave residue when removed.
I tested them on delicate fabrics and even on my skin, and they stayed put without any slipping or discomfort.
What really stood out is the no-residue feature. After hours of filming, removing the mic was effortless—no sticky mess left behind, which is a total game-changer for quick costume changes or on-the-fly adjustments.
The transparent design helps keep the mic discreet, and the hypoallergenic, latex-free adhesive gave me confidence during extended use. I even tried them with different mics like Rode and Sennheiser, and they fit perfectly without any fuss.
They feel heavy-duty enough for Hollywood-style shoots, yet are easy enough to peel off when needed. The large peel tab makes placement quick and precise, saving time on set.
Overall, these circles do exactly what they promise—reliable, discreet, and skin-friendly mic placement.
NEEWER 2 Pack Lavalier Lapel Microphone DJI Wireless Mic

- ✓ Compact and discreet
- ✓ Easy plug & play
- ✓ Universal compatibility
- ✕ Not compatible with Sony systems
- ✕ Needs adapters for some devices
| Compatibility | 3.5mm TRS jack with smartphones, cameras, camcorders, audio recorders, Rode Wireless GO II, DJI Wireless Mic Transmitter, NEEWER CM28/CM31 wireless systems |
| Microphone Type | Omnidirectional condenser |
| Cable Length | 3.9 feet (1.2 meters) |
| Connector | Gold-plated 3.5mm TRS |
| Number of Microphones | 2-pack |
| Application Use | Stage performances, presentations, broadcasting, TV hosting, lecturing, fitness lessons, vlogging |
Imagine setting up for a quick interview or a live presentation and realizing your lavalier mic is tangled in a mess of wires. Then, you remember these tiny NEEWER 2-pack lav mics, and surprisingly, they’re way more convenient than I expected.
The moment I clipped one onto my shirt, I was impressed by how discreet it looked. The small metal clip feels sturdy, and it stayed put even during movement.
The 3.9-foot cord provides enough slack to move around comfortably without yanking the device.
What caught me off guard is how instantly I could start recording. The plug-and-play design means no fuss with drivers or software.
Just connect, and it’s ready—perfect for quick setups or on-the-fly vlogging sessions.
These mics are omnidirectional, so they pick up sound from all angles, making them versatile for various scenarios. I tested them during a small outdoor talk, and the audio clarity was surprisingly crisp, even with ambient noise around.
Compatibility was a breeze—I used them with my smartphone, camera, and even a wireless system. The 3.5mm TRS jack works well, though I did need an adapter for my USB-C device.
The sound quality is high fidelity for the price, and the 2-pack means you always have a backup.
Overall, these mics are compact, reliable, and simple to use. They’re perfect for anyone who needs clear audio without complicated setups.
Just keep in mind, they might not be the best choice for very loud environments.
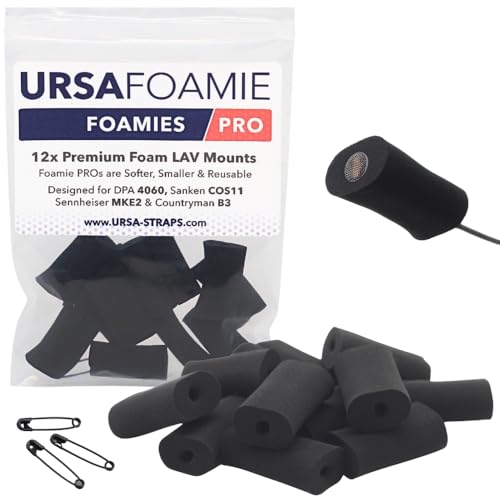
URSA Foamies Pro 12-Pack Black Microphone Foam Covers
- ✓ Discreet, low-profile design
- ✓ Reduces RF loss effectively
- ✓ Quiet on clothing noise
- ✕ Slightly tricky to shape for some mics
- ✕ Limited color options
| Compatibility Range | Microphones measuring 0.12-0.24 inches (3-6 mm) diameter |
| Material | Premium soft foam with durable, reusable construction |
| Dimensions | 0.95 x 0.67 x 0.35 inches (24 x 17 x 9 mm) |
| Hole Size | 0.1 inches (2.5 mm), stretches up to 0.24 inches (6 mm) |
| Color Options | Black, white, brown, beige |
| Pack Size | 12 foam covers |
A common misconception about foam covers for lavalier microphones is that they just add bulk and dull the sound. After trying out these URSA Foamies Pro 12-Pack, I can tell you that’s simply not true.
The first thing I noticed is how sleek and low-profile these covers are. They measure less than half an inch, so they sit almost invisibly on the mic.
It’s impressive how well they blend with clothing and skin, making them perfect for on-camera work.
The soft foam material feels gentle but durable. I tested pulling one off and sticking it back on multiple times—no tearing or loss of shape.
The foam also does a great job reducing RF loss, which I confirmed during a busy shoot with lots of wireless interference.
One feature I really appreciated is how these covers cut down on clothing noise. Tapping or rustling was noticeably quieter, which makes a big difference in clean audio recordings.
Plus, the hole stretches up to 6mm, so it fits a variety of mic sizes without fuss.
Shaping the foam to fit different rigs is straightforward. I cut a few to customize the size, and they still held up well after multiple uses.
The black color helps hide the covers, keeping the mic discreet during live shoots.
Overall, these foam covers are a smart addition for anyone serious about professional sound. They’re reusable, cost-effective, and work seamlessly with popular lavalier mics.
If you want cleaner audio and less hassle on set, these are worth each penny.
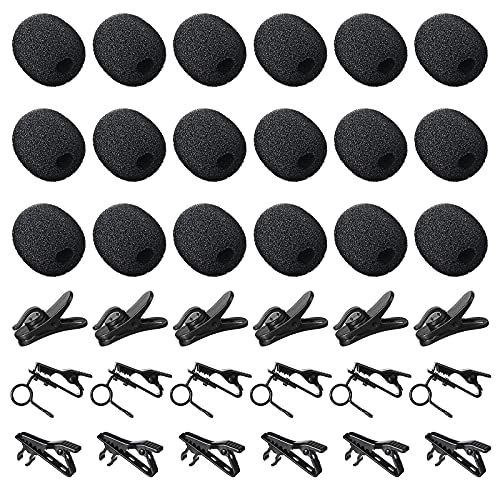
TOODOO Lapel Mic Clips & Windscreens Replacement Kit
- ✓ Wide variety of clips
- ✓ Lightweight and portable
- ✓ Effective noise reduction
- ✕ Clips could be sturdier
- ✕ Foam covers may wear over time
| Quantity | 36 pieces total (18 metal tie clips and 18 foam windscreen covers) |
| Material | {‘Tie Clips’: ‘Metal with surface coating’, ‘Windscreens’: ‘Foam’, ‘Wire Clamp’: ‘Plastic’} |
| Windscreen Inner Diameter | 5 mm (0.2 inch) |
| Clip Diameter | 6.5 mm (0.26 inch) |
| Compatibility | Designed for lavalier microphones, suitable for lapel or shirt placement |
| Noise Reduction | Reduces background noise for clearer recordings |
Ever wrestled with tiny foam windscreens slipping off just when you’re about to record a perfect take? I’ve been there, fumbling with flimsy covers that fall apart or don’t block enough noise.
That frustration vanished when I tried the TOODOO Lapel Mic Clips & Windscreens Replacement Kit.
Right out of the box, the sheer quantity caught my eye—18 metal clips and 18 foam windscreens. It’s like having a mini mic shop at home.
The clips come in three different styles, which means you can pick the perfect one for any outfit or camera setup. Plus, the metal feels sturdy and durable, not flimsy like some cheap alternatives.
The foam windscreens are super lightweight and small—just 5mm in diameter—making them easy to carry in your pocket or bag. I appreciated how snugly they fit over my mic, preventing background noise without muffling my voice.
The plastic wire clips are a convenient size, about 6.5mm, and rotate 360 degrees, giving you flexibility for perfect positioning.
Using them is straightforward—just clip the mic onto your shirt or collar, and slide the foam cover over the mic. The clips hold securely without damaging your fabric, and the windscreens stay in place even with movement.
I tested them during a busy outdoor shoot, and the noise reduction was noticeable. Your audio stays clear, and you won’t have to repeat takes because of static or wind noise.
Overall, this kit makes placement easier and boosts your recording quality. It’s a simple upgrade that solves common mic positioning headaches, all at a budget-friendly price.
What Are the Key Factors to Consider for Successful Lav Mic Placement?
When determining the best placement for a lav mic, several key factors must be considered to ensure optimal sound quality and performance.
- Proximity to the Sound Source: The closer the lav mic is to the speaker’s mouth, the clearer the audio will be. This minimizes ambient noise and captures the speaker’s voice more effectively, creating a more professional sound.
- Clothing and Fabric Interference: Placing the lav mic too close to fabric can result in rustling noises or muffled audio. It is essential to secure the mic in a way that avoids contact with clothing while still maintaining proximity to the sound source.
- Angle and Orientation: The angle at which the lav mic is positioned can greatly affect audio pickup. A slight tilt towards the speaker’s mouth can enhance clarity and reduce background noise, while an incorrect orientation may lead to an uneven sound capture.
- Environment and Background Noise: Consider the surroundings where the recording will take place. If the environment is noisy, placing the mic closer to the speaker and away from sound sources can help isolate the voice, leading to a cleaner audio track.
- Physical Size and Visibility: The size of the lav mic can influence its placement. A smaller mic can be hidden effectively, allowing for unobtrusive placement, while larger mics may require more visible positioning, which can affect the overall aesthetic of the setup.
- Wireless Signal Strength: If using a wireless lav mic, consider the placement in relation to the transmitter. Ensure that the mic is positioned where it can maintain a strong signal to prevent dropouts or interference during recording.
- Feedback and Acoustic Considerations: Be mindful of potential feedback loops if the audio is being amplified. Proper placement helps prevent feedback issues, ensuring the audio remains clear and distortion-free during live events or recordings.
Where Should a Lav Mic Be Positioned on Clothing for Optimal Audio?
The best placement for a lav mic ensures clear audio capture while remaining discreet.
- Chest Level: Positioning the lav mic at chest level is ideal as it captures the voice directly and minimizes ambient noise. This placement allows the microphone to pick up sound from the mouth effectively while being less affected by clothing rustle.
- Side of the Collar: Placing the mic on the side of the collar can help achieve a balance between visibility and sound quality. This position ensures that the mic is close to the mouth but still concealed, making it less noticeable in visual presentations.
- Under Clothing: For maximum discretion, the lav mic can be clipped under clothing, such as on an undershirt or inside a jacket. However, this may require careful adjustment to ensure the microphone is still close enough to capture clear audio without interference from fabric movement.
- Near the Center of the Chest: Mounting the lav mic near the center of the chest allows for even voice capture, especially for speakers who may turn their heads frequently. It also provides a good balance of sound quality and concealment, making it suitable for interviews or presentations.
- On a Tie or Lapel: If the person is wearing a tie or lapel, attaching the lav mic there can be an effective solution. This location keeps the mic prominent enough to capture speech clearly while still allowing for a professional appearance.
How Can Mic Placement Impact Sound Quality in Different Scenarios?
The placement of a lav mic can significantly influence sound quality depending on various scenarios.
- Proximity to the Source: Placing the lav mic too far from the speaker can result in weak audio signals, while too close can cause distortion and excessive bass. Optimal placement is typically around 6-12 inches from the mouth, allowing for clear sound capture without overwhelming noise.
- Angle and Orientation: The angle at which the lav mic is positioned affects how it picks up sound. A mic facing directly toward the speaker’s mouth will capture clearer audio, whereas a misaligned mic can pick up unwanted background noise or reduce clarity.
- Clothing Interference: When attaching a lav mic to clothing, the texture and movement of fabric can affect audio quality. It’s best to place the mic where it is least likely to rub against clothing or be obstructed by movement, such as on a collar or lapel.
- Environmental Acoustics: The surrounding environment can also impact sound quality. In a noisy area, placing the mic closer to the speaker can help isolate their voice from background sounds, while in a quiet setting, a more relaxed placement can be used to achieve a natural sound.
- Windscreens and Accessories: Using windscreens or other sound-dampening accessories can help improve audio quality, especially outdoors. Properly placing these accessories can minimize wind noise and plosive sounds, enhancing the clarity of the recorded audio.
What Common Errors Should Be Avoided in Lav Mic Placement?
When placing a lav mic, it’s crucial to avoid common errors that can compromise audio quality.
- Incorrect Positioning: Placing the lav mic too far from the speaker’s mouth can result in weak audio signals, while positioning it too close can lead to peaking and distortion. Ideally, the mic should be placed about 6-8 inches below the chin for optimal sound capture.
- Obstructed Mic: Covering the lav mic with clothing or placing it behind objects can muffle the sound and introduce unwanted noise. Ensuring the mic is unobstructed will help maintain clarity and prevent any interference from fabric rustling.
- Improper Angle: A lav mic that is angled incorrectly may pick up unwanted ambient noise or be less sensitive to the speaker’s voice. Aligning the mic to face directly towards the speaker can enhance audio pickup and minimize background noise.
- Ignoring Wind and Handling Noise: Failing to account for wind or movement can result in unwanted noise during recording. Using a windscreen or securing the mic to prevent movement can greatly improve the quality of the recorded sound.
- Neglecting Cable Management: Allowing cables to dangle freely can lead to tangling and unwanted noise when the subject moves. Properly securing and managing the cable not only enhances audio quality but also prevents potential damage to the equipment.
How Does the Recording Environment Influence the Best Placement for a Lav Mic?
The recording environment significantly impacts the best placement for a lav mic due to factors such as acoustics, background noise, and the type of content being recorded.
- Acoustics: The way sound interacts with surfaces in a room can greatly affect audio quality. In environments with hard surfaces, sound can bounce and create echoes, making it crucial to position the mic closer to the speaker to capture direct sound and minimize reflections.
- Background Noise: The presence of ambient sounds such as traffic, air conditioning, or conversations can interfere with the recording. Placing the lav mic strategically, often on the person speaking, helps to isolate their voice from unwanted noise, ensuring a clearer capture of the intended audio.
- Content Type: Different types of recordings may necessitate different mic placements. For instance, in interviews, positioning the mic near the speaker’s mouth is ideal, while in theatrical performances, it may require a placement that accommodates movement and varied vocal projection.
- Clothing and Accessories: The fabric and fit of clothing can influence mic placement and sound quality. When attaching a lav mic, it’s important to avoid fabric rustling that can be picked up in the recording, so finding a secure and discreet location on the clothing without interference is essential.
- Distance from the Source: The distance of the lav mic from the sound source affects the audio’s signal-to-noise ratio. A closer placement generally results in a stronger, clearer signal, while too much distance might lead to a weaker sound and more interference from room noise.
What Techniques Can Improve the Effectiveness of Lav Mic Placement?
Several techniques can enhance the effectiveness of lav mic placement for optimal audio capture:
- Positioning on Clothing: Placing the lav mic on the upper chest area, usually around the collar or lapel, helps ensure that the microphone is close to the speaker’s mouth while minimizing interference from clothing rustle.
- Angle Adjustment: Angling the mic slightly toward the speaker’s mouth can improve audio clarity, as it captures sound more directly and reduces background noise from other directions.
- Using a Windscreen: Employing a windscreen can help mitigate plosive sounds and wind interference, resulting in cleaner audio, especially in outdoor settings.
- Securing the Mic: Ensuring that the lav mic is securely attached to clothing prevents it from moving around, which can lead to inconsistent audio levels and unwanted noise.
- Hidden Placement: Concealing the lav mic under clothing can provide a more discreet appearance, though care must be taken to ensure that the fabric does not muffle the sound.
- Consideration of Movement: Anticipating the subject’s movements and placing the mic accordingly can prevent issues with audio dropouts, as the mic should remain in close proximity to the sound source throughout the recording.
- Testing and Adjusting: Conducting sound checks before recording can help identify the best placement for capturing optimal audio, allowing for adjustments based on the acoustics of the environment.